Tuesday, August 25, 2026

What a Smart Thermostat Actually Saves, and How to Get a Rebate for It

Thermostat Savings and Rebates

The Number the Certification Actually Guarantees
What Is Guaranteed

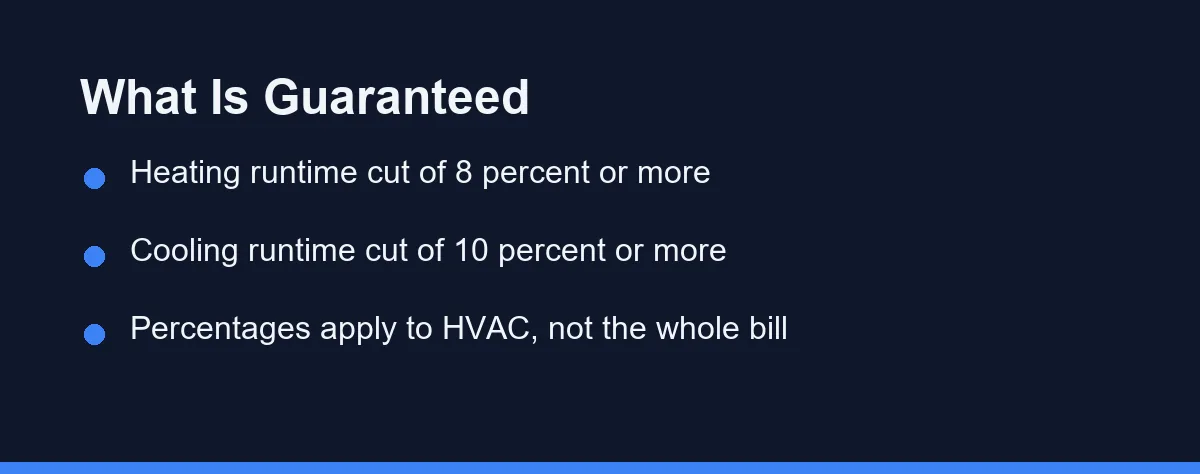
Expect a cut of roughly 8 percent on heating energy and 10 percent on cooling energy, not a cut to your whole bill. Those are the floors ENERGY STAR requires before it certifies a model, verified against a year of field data from hundreds of real homes. ENERGY STAR also reports that heating and cooling take almost half of the average American energy bill, more than $900 a year. Apply the percentages to that slice rather than the total and the honest annual saving lands in the tens of dollars for most households.

The rebate is often worth more than the first year of savings, which is why it deserves as much attention as the model you pick.

Where the $900 Figure Comes From

ENERGY STAR puts heating and cooling at almost half of an average household energy bill, more than $900 a year. That figure covers the furnace, the heat pump, and the air conditioner.

It does not cover your water heater, your refrigerator, your lighting, or anything else plugged into a wall. A thermostat has no influence over those loads at all.

So the arithmetic runs on the conditioning slice only. Cutting heating runtime by 8 percent on a home that spends $500 a year on heat returns about $40, and the cooling side works the same way.

Why Your Result Will Not Match the Advertised Figure

ENERGY STAR publishes two different savings numbers for each certified thermostat, and the gap between them explains most of the disappointment people report.

The first is a lower 95 percent confidence limit, described as similar to an average across the sampled homes. Certification requires at least 8 percent for heating and at least 10 percent for cooling on this measure.

The second is a 20th percentile figure, and the requirement drops to 4 percent for heating and 5 percent for cooling. ENERGY STAR explains this plainly: 4 out of 5 homes in the sample saved at least that much.

Read that second pair as the realistic floor for a household that already runs a sensible schedule. The average-style number belongs to homes that were leaving the heat on all day before.

The Rebate Routes and What Each One Asks of You

Five Ways to Get Paid

Rebates come from individual utilities rather than from ENERGY STAR, so the amount and the mechanics change by territory. The routes themselves are consistent, and knowing which one you are looking at saves a lot of confusion.

Route How the money reaches you What it asks of you What to verify first
Instant discount at checkout Price drops at a participating retailer Nothing beyond buying the listed model That your exact model number is on the eligible list
Post-purchase rebate Check or bill credit weeks later Receipt, model number, account number, a form The submission deadline after purchase date
Utility marketplace Discount is already inside the shelf price Buying through the utility storefront Whether the marketplace price beats retail plus rebate
Demand response enrollment Sign-up bonus plus annual credits Letting the utility adjust the setpoint on peak days The number of events per season and the opt-out rule
Income-qualified program Thermostat supplied at low or no cost Eligibility documents and often an installer visit Which agency runs it in your state
Retailer promotion Gift card or bundle discount Timing the purchase to the sale Whether it stacks with the utility rebate

Start with the ENERGY STAR Rebate Finder, which takes a ZIP code and lists partner offers. Then open your own utility site, because the finder shows sponsored programs and does not always cover every provider.

What Demand Response Enrollment Really Trades

The enrollment route pays the most in many territories, and it is the one people sign up for without reading. The utility gains the ability to nudge your setpoint during a small number of peak demand periods.

ENERGY STAR requires certified thermostats to support these programs while keeping a consumer override, so you can push the temperature back. The trade is not control, it is attention, since overriding means noticing that an event is running.

Two numbers decide whether it suits you. How many events the program runs per season, and how far it moves the setpoint each time.

A household that is out all day rarely notices. A household with a newborn, a night shift sleeper, or a home office in a hot upstairs room may care a great deal, and cooling that upstairs bedroom is already the harder problem.

The Wiring Check That Decides Whether Any of This Applies

None of the savings arithmetic matters if the thermostat cannot power itself on your wall. Most models want a C wire, which supplies continuous low voltage rather than borrowing it from the heating call.

Pull the faceplate off and photograph the terminal block before you shop. Count the wires and note the lettered terminals, since that photo answers the compatibility question faster than any product page.

Missing the C wire is common in older homes and it is not fatal. Some thermostats include an adapter in the box, some brands sell one, and some installations need a new run, which is the case that can cost more than the rebate returns. Our guide to thermostats without a C wire covers the options in detail.

Five Requirements Behind the Logo That Marketing Skips

The certification is stricter than the badge suggests, and a few of the criteria are genuinely useful buying filters.

A certified thermostat has to keep working as a plain thermostat when connectivity drops. It has to show you your HVAC energy use rather than only a schedule screen. It has to hold temperature accuracy within 2.0 degrees Fahrenheit.

It also has to draw no more than 3.0 watts on average in network standby, and it has to support utility demand response with an override you control. The current specification took effect on January 1, 2017.

Those last two are the ones worth remembering. A thermostat that cannot join a demand response program cuts you out of the best paying rebate route in many territories.

Which Rebate Route Fits Your Household

Pick Your Route

The best route depends on your climate, your schedule, and how much paperwork you tolerate.

You want this done in one trip: Take the instant discount at a participating retailer. It pays less than enrollment in most territories, but nothing expires and nothing gets rejected for a missing receipt.

You run heavy air conditioning all summer: Demand response enrollment usually pays the most, because that is precisely the load the utility wants to shift. Check the event count before signing.

You are replacing a manual dial in a mild climate: The upgrade still pays, though the honest expectation sits near the 4 and 5 percent floors rather than the headline. Compare the models in our Nest and ecobee comparison before choosing.

You rent or expect to move within two years: Skip enrollment programs with multi-year commitments and keep the original thermostat in a labeled bag. The instant discount route leaves nothing to unwind.

Your household income qualifies for assistance: Look for the state weatherization or utility income-qualified program first. These often supply the device and the installation together, which removes the wiring risk entirely.

Mistakes That Cost People the Rebate

Buying the wrong model number is the most common. Eligible lists are specific down to the trailing letters, and a similar looking model from the same brand is frequently excluded.

Missing the submission window is the second. Post-purchase programs typically run on a deadline measured from the purchase date, and the receipt has to show that date clearly.

The third mistake is quieter. People enroll in demand response, get annoyed during the first heat wave, opt out of the program entirely, and forget that the annual credit stops with it.

The Order That Avoids Wasted Money

Photograph your wiring first. Everything else depends on whether the wall can power the device you want.

Next, look up the offers for your address, both on the ENERGY STAR Rebate Finder and on your own utility site. The eligible model list is the real shopping list, and it should shape the shortlist rather than the other way around.

Then set a realistic expectation. If the thermostat replaces a programmable model you already used well, the gain sits nearer the floor figures, which our comparison of smart and programmable thermostats walks through.

Full criteria and the rebate lookup live on the ENERGY STAR smart thermostat page, and utility program terms change every year, so confirm the current offer before you buy.

FAQ

How much does an ENERGY STAR smart thermostat actually save?

ENERGY STAR requires certified models to cut heating runtime by at least 8 percent and cooling runtime by at least 10 percent, measured against the homes in the field sample. Those percentages apply to heating and cooling energy, not to your whole electric bill, so the dollar figure depends on how much you spend on conditioning the house.

How do I find out what rebate my utility offers?

Start with the ENERGY STAR Rebate Finder and enter your ZIP code, then check your own utility website directly. Rebate programs are sponsored by individual utilities rather than by ENERGY STAR, so the finder shows partner offers but is not a complete list for every territory.

Can I claim a rebate and a demand response bonus for the same thermostat?

Usually not the full amount. Many utilities run two separate offers, one rebate for buying a qualifying thermostat and one enrollment incentive for joining a demand response program. Read whether the terms describe them as combinable, because some programs pay the enrollment bonus only to customers who did not take the purchase rebate.

Does a smart thermostat still work if the internet goes down?

Yes. ENERGY STAR requires certified thermostats to keep working as an ordinary thermostat when connectivity drops, so a router outage leaves you with manual control and your existing schedule rather than a blank wall plate.

What stops a smart thermostat from working with an older heating system?

The common blocker is a missing C wire, which supplies continuous power. Some thermostats ship with an adapter that solves it, and some systems need a new wire run. Confirm what your wall plate has before buying, because the fix can cost more than the rebate returns.

Sources

About the author. Jay Lim runs HomeVersus as an independent, one-person publication. Articles are researched against official documentation, pricing pages and regulators rather than hands-on lab testing. How we research · Report an error


Some links may be affiliate links. We may earn a commission at no extra cost to you.

This article was written with AI assistance. It is researched and fact-checked, not based on personal hands-on testing unless explicitly stated.

Should You Put Smart Home Devices on a Guest Network?

Smart Devices on a Guest Network

Isolation Is the Feature and Also the Problem

For most homes the answer is no, and the reason is one setting. A guest network turns on client isolation, which stops devices on that network from talking to each other. Smart home control depends on exactly that conversation, so casting, speaker groups, and local app control break while cloud features keep working.

The better move takes the same ten minutes. Create a second named network for devices, leave isolation off, and give the 2.4 GHz band its own name so older gear can find it.

That advice sounds like a small correction to a popular tip. It is really the difference between a network that protects you and one that quietly costs you an evening of troubleshooting.

Why the Advice Sounds Right in the First Place

The security logic behind it is sound. Cheap smart plugs and cameras run firmware that may never see another update, so keeping them away from laptops and network drives is a genuine improvement.

Every security guide reaches the same conclusion, and it recommends segmentation. The mistake happens one step later, when the guest network gets treated as the ready-made way to do it.

Guest networks were built for a different job. They exist to hand a visitor internet access while keeping that visitor away from everything you own.

Smart home devices are not visitors. They need to reach each other, reach your phone, and sometimes reach a hub sitting on the shelf.

What a Guest Network Actually Does to Your Traffic

The Mechanism
  • ● Client isolation blocks device to device
  • ● Discovery runs on broadcast traffic
  • ● Cloud features survive, local ones do not

Client isolation is the core of it. With that setting on, the router forwards traffic between a device and the internet, and it drops traffic between two devices on the same network.

Discovery is the first casualty. Phones find speakers, casting targets, and printers through broadcast protocols such as mDNS and SSDP, and those broadcasts stop at the isolation boundary.

The result confuses people because the failure is partial. A cloud-connected bulb still responds to a voice command routed through a server, while the same bulb vanishes from the local device list in the app.

Guest networks add a second obstacle on many routers. They often rotate the password on a schedule or expire access after a set period, which is helpful for visitors and terrible for a thermostat that reconnects after a power cut.

The Five Things That Break First

Casting goes first, every time. Sending video from a phone to a streaming stick needs both ends on the same local network without isolation.

Multi-room audio follows. Speaker groups keep clocks in sync by talking directly to each other, and isolation leaves each speaker alone on its own island.

Matter setup fails in a way that looks like a broken device. Commissioning over Wi-Fi expects your phone and the accessory to reach each other locally, and the pairing simply times out.

Hub-based systems break in the middle. Put the hub on one network and the accessories on another, and the hub stops seeing them. Our guide to whether you need a smart hub at all covers when that middle layer earns its place.

Local camera streams stop last. Many cameras fall back to a cloud relay, so the stream still loads while the fast local view disappears, and you may not notice until the internet goes down.

How to Recognize an Isolation Problem in Ten Seconds

Isolation failures have a signature, and once you know it you stop blaming the hardware. Voice commands keep working while the app cannot find the device.

That split happens because the two paths are different. A voice command travels out to a server and back down to the device, while the app is trying to reach the device directly across the room.

The second clue is timing. Everything worked until someone changed the network, added a mesh node, or reset the router to factory settings.

The third clue is selective failure. Cloud-heavy brands look fine, local-first gear looks broken, and no pattern based on price or brand explains which is which.

Guest Network Against a Dedicated Device Network

The Real Choice
  • ● Same idea, one setting apart
  • ● Rotating passwords break rejoining
  • ● Name the network for its job

The table below compares the three layouts people actually choose. The distance between the first two columns is a single checkbox on most routers.

What you need Guest network Separate device network VLAN with firewall rules
Devices kept off your laptops Yes Yes Yes, with fine control
Devices can reach each other No Yes Yes, where you allow it
Casting and speaker groups Broken Works Works with mDNS forwarding
Matter and hub pairing Usually fails Works Works if the phone is allowed in
Password stability Often rotates Fixed Fixed
Setup time About 5 minutes About 10 minutes An evening, plus reading
Router needed Any modern router Most dual-band routers Prosumer or business gear

Look at row two and row three together. Those two lines explain nearly every support thread that starts with a working smart home and ends after someone moved the devices for safety reasons.

The third column is genuinely better than the second, and it costs real time. Anyone comfortable writing firewall rules already knows whether that trade is worth an evening.

Why Your Phone Has to Live Somewhere Too

The device network question hides a second question that catches people out. Your phone controls the devices, so the phone needs a path to them.

Two workable patterns exist. Keep the phone on the main network and allow it through to the device network, or join the device network while you are at home and accept that setup steps happen there.

Most consumer routers do not offer that first option cleanly. Without VLAN rules, the practical version is one device network that both your phone and your gear can use.

Guest access for actual guests belongs to a different problem, and it has a cleaner answer. Our walkthrough on sharing smart home access without handing over your password covers the app-level invitations that replace giving out Wi-Fi credentials.

The Setup That Works Without Business Grade Gear

Start by splitting the bands into separate network names. Many smart devices join only 2.4 GHz, and a single combined name causes setup failures that look like faulty hardware.

Name the device network for its job, something like HomeDevices, and confirm client isolation is switched off there. That single check is the whole point of the exercise.

Move the noisy, rarely updated devices over first. Plugs, bulbs, cameras, and older appliances gain the most from separation, while a hub often needs to sit wherever the accessories are.

Watch the device count as you go, because a busy 2.4 GHz band degrades before you hit any documented limit. Our piece on how many devices one router can handle explains where the real ceiling sits.

The whole job fits into one sitting if you work in this order.

  • Name the bands separately. Give 2.4 GHz and 5 GHz different network names before you touch anything else.
  • Create the device network. Use a plain descriptive name and a password you can type on a phone keypad.
  • Find the isolation setting. Routers label it client isolation, AP isolation, or guest mode, and it must be off.
  • Move one device and test. Pick something you use daily, then check both app control and voice control.
  • Migrate in batches. Do the plugs and bulbs together, then the cameras, then anything with a hub.
  • Write the password down. Every device that reconnects after a power cut needs it again, sometimes months later.

Expect one or two devices to resist the move. Older gear occasionally stores the network name in a way that survives a reset, and re-pairing from the app is faster than fighting it.

Which Network Setup Fits Your Home

Pick a Layout

The renter with a landlord router: Use one extra network name and stop there. Two names, isolation off on the device side, and no VLAN work you cannot take with you when you move.

The household that casts every evening: Skip the guest network entirely. Casting and speaker groups are the first things isolation breaks, and no security gain justifies losing them daily.

The home with several cameras: Give the cameras their own network and keep the recording target with them. Cameras are the strongest argument for separation, since they combine constant uploads with firmware you cannot audit.

The tinkerer with prosumer gear: Build the VLAN properly and turn on mDNS forwarding. You get the security model everyone else approximates, and the setup only has to happen once.

The person who just wants fewer dropouts: Split the bands and ignore segmentation for now. Most reliability complaints trace back to band steering rather than to security layout.

The household with an aging hub: Keep the hub and its accessories together on one network. Splitting them is the most common way a working system becomes an unpredictable one.

What This Does and Does Not Protect You From

Segmentation limits lateral movement, and that is a real benefit. A compromised bulb on its own network cannot reach a laptop or a backup drive.

It does nothing about the cloud side. A device that phones home still phones home, and an account breach at the vendor is unaffected by how you named your networks.

It also does not save a product that gets discontinued. When a service shuts down, isolated devices go dark exactly like connected ones, which our look at what happens when a smart home brand shuts down covers in detail.

Local-first protocols reduce both problems at once. Devices that work without a cloud round trip survive outages and give you fewer reasons to worry about segmentation, and our Matter and Zigbee comparison explains which standards behave that way.

A Second Network Is Worth It, a Guest Network Usually Is Not

The instinct behind the question is right. Cheap devices with permanent firmware deserve their own lane, away from the machines that hold your files.

The execution is where it goes wrong. A guest network delivers isolation as its headline feature, and that feature is precisely what smart home control cannot survive.

Give your devices a network with a name, a fixed password, and no client isolation. You keep the separation you wanted, and everything still finds everything else.

FAQ

Is it safe to put smart home devices on a guest network?

Usually not. A guest network exists to isolate clients from each other, and smart home control depends on devices and phones talking on the same local network. The isolation that protects your laptop is the same setting that breaks casting and local control.

What is the difference between a guest network and a separate IoT network?

A dedicated IoT network is a second named network with client isolation switched off, so the devices can still find each other. A guest network is the same idea with isolation on and often a rotating password. The name on the router matters less than that one setting.

Will a guest network break casting and speaker groups?

Yes, in most cases. Casting, speaker groups, printers, and app-based local control rely on broadcast discovery, which client isolation blocks. Cloud-only features may keep working, which is why the failure looks random rather than total.

Can I set up a Matter device on a guest network?

Only if your phone can reach the device during setup. Matter commissioning over Wi-Fi expects the phone and the accessory to be on the same local network, so a phone on the main network and an accessory on an isolated guest network fails.

My devices only join 2.4 GHz. Does a guest network help with that?

Split the bands into separate names instead. Give the 2.4 GHz band its own network name for the devices that need it, keep 5 GHz for phones and laptops, and leave client isolation off on the device network.

Sources

About the author. Jay Lim runs HomeVersus as an independent, one-person publication. Articles are researched against official documentation, pricing pages and regulators rather than hands-on lab testing. How we research · Report an error


Some links may be affiliate links. We may earn a commission at no extra cost to you.

This article was written with AI assistance. It is researched and fact-checked, not based on personal hands-on testing unless explicitly stated.

Sunday, August 23, 2026

LiDAR vs Camera Navigation on a Robot Vacuum

Laser vs Camera Robot Navigation

Mapping Is Laser Work And Dodging Is Camera Work

Buy laser mapping for multiple rooms or floors. Pay for camera recognition only if cables, socks or a pet make the floor unpredictable. iRobot lists the Roomba 105 Vac at $249.99 and the Roomba Max 705 Combo at $1,299.99. Eufy lists the X10 Pro Omni with AI.See obstacle avoidance at $899.99, all as of September 2026.

The two solve different problems and product pages rarely separate them. A robot that maps beautifully can still swallow a charging cable. A robot that dodges everything can still lose track of which room it is in.

Most disappointment traces back to buying the wrong half. The rest of this walks through which half your floor actually needs.

What A Spinning Turret Buys And What It Costs In Height

The Laser Case

Laser distance sensing measures the room by timing reflected light. The result is a floor plan that holds up in a dark hallway at two in the morning, because the robot brings its own light source.

That accuracy pays off in ways people underestimate. Room by room cleaning, no go zones, multi floor maps and a sensible cleaning order all depend on knowing where the walls are.

The classic cost is height. A rotating turret sits proud of the body, and that extra height decides whether the robot fits under a sofa or a kitchen kickboard.

Makers are working around it. Roborock lists the Saros 10R at 3.14 inches tall with no raised turret, using what it calls the StarSight Autonomous System 2.0 instead.

Measure before you shop. The gap under your lowest piece of furniture is a hard number, and no feature list overrides it.

What A Camera Sees That A Laser Cannot

The Camera Case

A map has no opinion about what is lying on the floor. A camera, paired with recognition software, is what tells a robot that the dark shape ahead is a cable rather than a shadow.

This is the feature that saves a cleaning run. Charging cables, socks, shoelaces and pet waste are the four objects that turn an unattended clean into a mess spread across a room.

Makers name these systems separately from mapping, which is a useful signal when reading a spec page. Roborock markets ReactiveAI 3.0 on the Saros 10, and eufy markets AI.See on the X10 Pro Omni at $899.99.

The weakness is light. Recognition degrades in a dim room, which is why several models add a small forward facing lamp, and why a robot that runs at night may perform differently than the demo suggests.

The Third Approach Nobody Puts On The Box

Below both tiers sits simple navigation, sometimes called gyroscope or bump and continue. The robot estimates position from its own wheel movement and corrects when it hits something.

It is not useless. In a studio or a single open room, coverage on a random or lightly structured path gets the floor clean, and the price reflects it.

The limits show up fast in a real house. No persistent map means no room selection, no reliable no go zones, and a return to base that sometimes wanders.

This tier is also where the cheapest sale prices live. If your whole home is one floor and one big room, that trade can be entirely rational.

Three Named Systems And What They Cost Right Now

The table below compares the approaches on the points that decide daily behaviour rather than spec sheet pride.

What matters Laser mapping Camera recognition Simple gyroscope
Builds a reusable floor plan Yes, fast and accurate Sometimes, often paired with a laser No persistent map
Works in a dark room Yes, it supplies its own light Degrades without light or a lamp Yes, it does not see anyway
Dodges a charging cable No, that is a different sensor Yes, this is the whole point No
Effect on robot height Turret designs add height Minimal, sensors sit in the front bumper Minimal
Typical price band, August 2026 $450 to $1,400 $899.99 on the eufy X10 Pro Omni Around $250 to $470
Privacy questions None worth naming Real, ask where images go None

Prices in that row come from the current lineup pages at Roborock, eufy and iRobot. Sale pricing moves constantly, so confirm current pricing on the official site.

Suction numbers follow a similar pattern and deserve the same scepticism. Roborock lists 36,000 Pa on the Saros 20, 22,000 Pa on the Saros Z70 and 10,000 Pa on the S8 MaxV Ultra. Eufy lists 20,000 Pa on the Omni E28 and 8,000 Pa on the X10 Pro Omni.

Those figures come from different test methods, so they compare poorly across brands. Navigation decides whether the robot reaches the dirt at all, which makes it the more useful thing to spend on.

Where Each Approach Fails In A Real Room

Dark flooring is the classic laser edge case for cliff sensors rather than mapping, and it shows up as a robot refusing to cross a black rug. A strip of light coloured tape under the sensor is the common fix.

Glass and mirrors confuse both families. A floor to ceiling window can read as open space, which is why virtual walls in the app still earn their keep.

Recognition systems fail on unfamiliar objects. A trailing cable it has never classified may get treated as clutter to push, and a small toy can end up wedged in a brush.

Thick rugs defeat everyone equally. Height changes throw off wheel based position estimates, and a robot that climbs a rug crooked can drop half a map.

If your floors are mostly hard surfaces, the priorities shift again, and robot vacuums on hardwood covers what changes there.

The First Week Decides How Good The Map Gets

Navigation hardware sets the ceiling and setup decides how close you get to it. A robot that maps a cluttered house on day one learns a version of the floor that never quite matches the real one.

Run the first mapping pass with the floor as clear as you will ever keep it. Pick up the cables, lift the dining chairs, and open every internal door you want the robot to know about.

Then do the naming and the zones in one sitting. Room labels, no go zones around pet bowls and a virtual wall in front of the fireplace take ten minutes once and save a year of interruptions.

Save the map before you rearrange anything. Most apps let you keep several versions, and a saved map is the difference between moving a sofa and rebuilding the house from scratch.

For a second floor, carry the robot up and run a fresh mapping pass rather than cleaning immediately. Multi floor storage only works if each floor gets its own deliberate scan.

When Navigation Starts Going Wrong

Robots rarely fail all at once. They drift, and the symptoms point at different parts of the system.

A robot that gets lost mid clean and wanders usually has a dirty or blocked sensor window. Wipe the turret, the front bumper sensors and the cliff sensors underneath with a dry cloth first, since that fixes more cases than any app setting.

A robot that maps fine but keeps eating cables has a recognition problem rather than a mapping one. No firmware update turns a laser into an object classifier, so that one is a purchase decision showing itself late.

A map that resets after every clean often traces back to the robot starting somewhere other than its dock. Send it home before each run and the map usually survives.

Privacy Is A Real Line Item With Cameras

A forward camera makes a robot better at its job and adds a question a laser never raises. Images may be processed on the robot, or uploaded, or both.

Check three things in the app before the first run. Whether obstacle photos leave the house, whether a remote view feature exists, and whether you can turn either off without losing navigation.

Households with a home office or a nursery should treat this as a decision rather than a footnote. The cleaning benefit is real, and so is the trade.

Roomba buyers should also know who now runs the app and its data. iRobot filed for Chapter 11 on December 14, 2025, and on January 23, 2026 became a privately held company wholly owned by Picea, its main contract manufacturer. iRobot said it set up a separate U.S. subsidiary, iRobot Safe, for consumer data, and at the filing it expected no disruption to app functionality or product support.

Which Navigation Fits Your Floor Plan

Deciding

Two floors or more: Pay for laser mapping. Multi floor map storage is what stops you carrying the robot upstairs and re teaching it the house every week.

Home with a dog or a cat: Prioritise recognition over suction numbers. Pet waste avoidance is the single feature that prevents the worst outcome, and pet hair in a small apartment covers the rest of that setup.

Studio or one open room: The simple tier is defensible. Around $250 to $300 gets a machine that cleans a small floor without a map it never needed.

Home office with cables everywhere: Recognition first, then mapping. A robot that avoids a desk nest is worth more than one that draws a perfect plan of the room it just tangled itself in.

Low sofas and kitchen kickboards: Measure the clearance and shop by height. A 3.14 inch body that fits beats a taller robot with a better sensor that cleans around the edges of every room.

Mopping is the main goal: Navigation still comes first, though the wet side has its own trade offs covered in robot vacuum versus robot mop.

What To Check On The Spec Page Before You Pay

Lineup pages advertise suction and docks, and they often skip navigation entirely. iRobot names dock and brush features on its lineup page without naming a navigation system, so the individual product spec tab is the page that matters.

Look for four things by name. A mapping technology, a separate obstacle avoidance name, a stated robot height, and whether the app supports multiple saved maps.

Check the network requirement too. Roborock notes that the Saros 10R supports 2.4 GHz Wi-Fi only, which trips up anyone running a single combined network band.

Then decide what the dock is worth separately. That question is answered in self emptying bases, and it has nothing to do with how the robot finds its way.

Buy For The Obstacle You Actually Trip Over

Walk your floor once and look down. The thing you keep stepping over is the thing your robot will meet at eight in the morning.

If that is doorways and stairs, buy mapping. If it is cables, toys and a dog, buy recognition, and treat the map as a bonus.

Homes that are neither can spend less than they expect. iRobot lists the Roomba 105 Combo at $319.99 and the Roomba Max 705 Combo at $1,299.99 as regular prices as of October 2026. That gap is mostly navigation and dock convenience, and only one of those two things changes how clean the floor gets.

FAQ

Does a robot vacuum need the lights on to navigate?

A laser turret does not need light, so it maps and cleans a dark room exactly as well as a lit one. Camera based obstacle avoidance is the part that struggles, which is why several makers add a small headlight to the front of the robot.

Does a LiDAR turret stop a robot from fitting under furniture?

Only if the body is tall enough to matter. A turret usually adds height, and clearance under a sofa or kickboard is where that shows up. Roborock lists the Saros 10R at 3.14 inches tall with no raised turret, so measure the gap under your furniture before you decide.

Is LiDAR the same thing as obstacle avoidance?

Not on its own. Mapping tells the robot where the walls are, while avoiding a charging cable or a sock is a separate recognition job handled by a camera or a projected light pattern. A robot can hold a perfect map and still eat a phone charger.

Do camera based robot vacuums send pictures to the cloud?

Any robot with a forward camera can upload images if the feature is switched on, and some models offer a remote view of the room. Check whether the app allows local only processing, and check whether obstacle photos leave the house at all.

How much more does better navigation cost?

Roughly $250 to $500 buys the simpler navigation tiers, with iRobot listing the Roomba 105 Vac at $249.99 and the Roomba 205 Combo at $469.99 as of August 2026. Fuller mapping and recognition sit closer to $450 to $1,400, so confirm current pricing on the official site before you plan a budget.

Sources

About the author. Jay Lim runs HomeVersus as an independent, one-person publication. Articles are researched against official documentation, pricing pages and regulators rather than hands-on lab testing. How we research · Report an error


Some links may be affiliate links. We may earn a commission at no extra cost to you.

This article was written with AI assistance. It is researched and fact-checked, not based on personal hands-on testing unless explicitly stated.

Saturday, August 22, 2026

Leak Sensors vs an Automatic Water Shutoff at Home

Leak Sensors vs Automatic Shutoff

Detection Is Cheap, Stopping The Water Is Not

Buy sensors first if you are home most days, and add a main line valve if the house sits empty for stretches. A handful of puck sensors costs tens of dollars, while a Moen Flo shutoff lists at $623.99 plus plumber labor. Sensors tell you something is wrong, and only a valve acts while you are four states away.

The distinction gets blurred by marketing, since both product families sell under the phrase leak protection. They solve different halves of the same problem.

A supply line to a washing machine can move several gallons a minute. The question is not whether you find out, it is how many minutes pass between the first drop and the water stopping.

That gap is the entire decision. Everything else is install effort and budget.

What A Puck Sensor Catches And What It Misses

The Sensor Case

A leak sensor is a battery-powered disc with two contacts on the bottom. Water bridges the contacts, the alarm sounds, and the app pushes a notification.

The strengths are real. Sensors cost very little, install in seconds, need no plumbing, and go anywhere a renter wants them. They also catch the slow leaks that never make it to a whole-house metric, like a supply valve weeping behind a toilet.

The weakness is just as clear. A sensor sees the floor it sits on and nothing else, so a pinhole leak inside a wall cavity runs for weeks without touching one.

The second weakness is the response. The alert is only as good as the person receiving it, and a phone on silent during a workday is a common way to lose a floor. Sensors reduce discovery time and never reduce flow.

What Only A Valve On The Main Can Do

A main line device sits inline where water enters the house and combines monitoring with a motorized ball valve. It watches flow and pressure continuously and closes the valve when the pattern looks like a leak.

The coverage is what you pay for. It sees every fixture and every pipe downstream, including the ones behind drywall that no puck will ever reach.

The detection method is more subtle than a wet floor. Moen states that its Flo device identifies leaks as small as a single drop per minute by tracking pressure and flow. Phyn uses pressure wave analysis with an ultrasonic flow sensor that has no moving parts.

There is a bonus that rarely appears in the sales pitch. Continuous flow data shows a running toilet or an irrigation zone stuck open, so the device pays a little of itself back on the water bill.

Two Real Systems And What They Cost

The Numbers

The figures below come from the manufacturer sites as of August 2026. Confirm current pricing on the official site before ordering, and treat plumber labor as a separate line item.

Option Example Price Install What it stops
Main line monitor and valve Moen Flo $623.99 Licensed plumber, cuts into the main Any leak downstream, automatically
Main line monitor and valve Phyn Plus 2nd Gen $579.99 Plumber recommended, mains up to 1.25 in Any leak downstream, automatically
Point sensors Puck sensors from most smart home brands Low tens of dollars each Drop on the floor Nothing, but it alerts fast
Sensor plus valve actuator Retrofit motor on the existing shutoff Mid hundreds DIY on an accessible valve Leaks a sensor detects
Appliance hose upgrade Braided stainless supply lines Under $30 a pair DIY behind the washer The most common burst point

Read that table as a ladder rather than a menu. The cheapest row prevents the single most common failure, and the most expensive row is the only one that acts without you.

Note the middle option too. A retrofit actuator clamps onto an existing quarter-turn valve and closes it on command, which avoids cutting pipe while still stopping flow.

It also inherits the sensor weakness. That system only reacts to leaks a puck detects, so a slab leak goes unnoticed.

The Install Is The Part People Underestimate

Hardware price is only half the number. Moen describes the Flo install as an advanced project that involves removing a section of the main water pipe, and recommends a licensed plumber.

Access decides the cost. A basement with an accessible main and a nearby outlet is a straightforward job, while a main buried in a finished wall or sitting in a tight crawlspace turns into a much longer visit.

Power and network need planning as well. Moen calls for an AC outlet within 10 feet of the device and sells 25-foot extension cables for spots that fall short.

Pipe size matters before you order. Moen sells the Flo in 3/4 inch, 1 inch, and 1-1/4 inch versions, and Phyn Plus fits mains of 1-1/4 inch or smaller with 1 inch threaded ends. Measure before you buy, because the wrong size means a return rather than an adapter.

Failure Modes Nobody Plans For

Both approaches fail in specific ways, and knowing them changes where you put the money.

Sensors fail silently. A dead battery gives no protection, and a sensor sitting an inch above the lowest point of the floor watches the water flow past it.

Valves fail annoyingly. A false positive can close the main while you are away, which is inconvenient with a refrigerator ice maker and worse with an irrigation system in July.

Connectivity failure hits alerts, not the valve itself. Shutoff logic runs on the device, so an internet outage costs you visibility rather than protection. It is still worth asking what happens when the manufacturer changes its cloud service, a risk covered in our piece on what happens when a smart home brand shuts down.

Household habits are the last failure mode. A device in learning mode that keeps flagging a long shower gets muted, and a muted device protects nothing. The same pattern shows up with alarms in our comparison of smart smoke detectors and smart batteries.

Test The Setup Before You Need It

Whichever half you buy, spend 20 minutes proving it works while the stakes are zero.

Wet a sensor with a damp cloth and time how long the phone alert takes. If the notification arrives silently or lands in a muted channel, fix that now rather than during a real leak.

For a valve, use the app to close the main and watch what the house does. You learn where the water sits in the lines, how long the refill takes, and whether anything downstream complains.

Then check the flow report after a quiet hour with every fixture off. A reading above zero points at a running toilet or an irrigation valve that never fully closes, which is the most common finding in the first week.

Write the manual shutoff location on a note inside the utility closet. Every automatic system eventually needs a human who knows where the handle is.

Which Setup Fits Your Home

Deciding

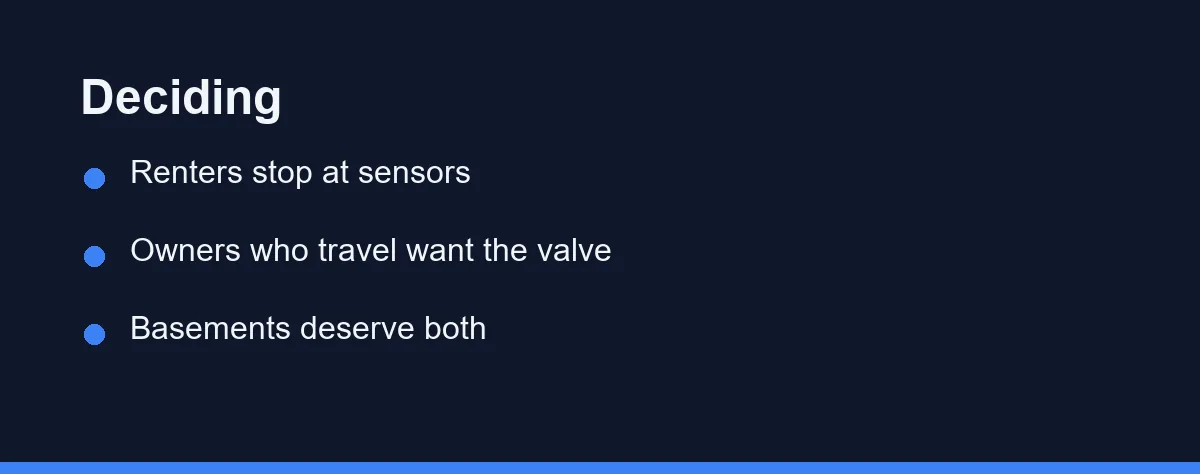
The renter: Sensors only. You cannot cut into a main you do not own, and five pucks in the right spots handle the leaks a renter can actually act on.

The owner who travels often: The valve earns its price here. An empty house is exactly the case where alerts have no one to reach, and an automatic close turns a flood into a mop.

The finished basement: Do both. Sensors give early warning at the appliances, and the valve limits the volume before it reaches drywall and flooring.

The condo or apartment owner: Check the building rules first, since many condos control the shutoff. A sensor set plus braided supply hoses covers most of the realistic risk and avoids a plumbing dispute.

The tight budget with old plumbing: Spend $30 on braided washing machine hoses, then add sensors at the heater and under the sinks. That sequence removes the highest probability failure for a rounding error compared to a valve.

Where The Money Gets Wasted

A few purchases look sensible and deliver very little.

Do not scatter sensors across dry rooms. Coverage means the five places water actually appears, not one in every room.

Do not buy a valve without checking the outlet and pipe size. A device that fits your budget and not your main is a return shipment.

Do not treat a shutoff as a reason to skip maintenance. Water heaters still age out, and a valve stops the flood without stopping the failure.

Do not assume an insurance discount. Some carriers offer one, many do not, and the discount rarely covers the install on its own.

Buy The Half You Are Missing

Most homes already have one half of this system and never think about it. If you are home most days with a phone in your pocket, you have the response half, and sensors are the cheap upgrade.

If the house sits empty during workweeks or winter trips, you have neither half. That is the case where several hundred dollars plus plumber labor buys something sensors cannot supply, which is an automatic decision at 3 a.m.

Start with the hoses, add sensors where water shows up first, and put a valve on the main when nobody is home to hear the alarm.

FAQ

Do water leak sensors shut the water off by themselves?

No. A puck sensor detects water on the floor and sends an alert, and someone still has to reach the valve. Pairing sensors with a motorized shutoff is what closes that gap, and some systems let a sensor alert trigger the valve automatically.

Does a smart water shutoff need a plumber?

For a main line device, yes in practice. Moen states that professional installation by a licensed plumber is recommended because the job involves removing a section of the main water pipe, and Phyn recommends the same for the Phyn Plus. Budget for labor on top of the hardware price.

What happens to a smart shutoff during a Wi-Fi or power outage?

The valve keeps working, since shutoff logic runs on the device rather than in the app. What you lose is the alert and remote control, so a power outage at the house is the weaker case, which is why battery backup and a wired outlet within 10 feet both matter.

Will home insurance discount a water shutoff device?

Some carriers offer a discount for a monitored shutoff, and some offer nothing. Ask your own insurer before counting on it, since the answer varies by state and policy. Moen also bundles a FloProtect plan that adds up to $5,000 of deductible coverage over a 3-year plan period.

Where should the first leak sensors go?

Start with the water heater, the washing machine, under every sink, and behind the dishwasher and refrigerator. Those five spots cover the majority of slow indoor leaks. Add a sensor near any finished floor below grade, since that is where damage gets expensive fastest.

Sources

About the author. Jay Lim runs HomeVersus as an independent, one-person publication. Articles are researched against official documentation, pricing pages and regulators rather than hands-on lab testing. How we research · Report an error


Some links may be affiliate links. We may earn a commission at no extra cost to you.

This article was written with AI assistance. It is researched and fact-checked, not based on personal hands-on testing unless explicitly stated.

Friday, August 21, 2026

Air Purifier vs Opening a Window

Purifier Or Window

Particles Or Stale Air

Open a window for gases, odours, and stuffiness, and run a purifier for particles you do not want to import. Cooking fumes, paint, and carbon dioxide need ventilation. Pollen, wildfire smoke, and dust need filtration with the windows shut. Cost splits the same way, since a window is free to open but expensive in extreme weather, while filters run from $22.49 to $62.99 per replacement on a Levoit unit as of August 2026.

The question usually arrives as a budget question. Someone looks at a $200 appliance and wonders whether the same result is available for free by opening a window.

It is a fair question with an unfair answer. The two options do not do the same job, so neither is a cheap substitute for the other.

Once you separate what each mechanism actually removes, the choice stops being about money and becomes a simple reading of what is in your air today.

Filtration And Ventilation Solve Different Problems

Two Mechanisms

A portable air cleaner pulls room air through media and pushes it back out. Whatever was suspended in that air stays in the filter, and the air itself never leaves the room.

That mechanism is excellent for particles. Dust, dander, pollen, smoke particles, and other fine matter get trapped, and a correctly sized unit does this repeatedly all day.

A window does something entirely different. It replaces indoor air with outdoor air, which dilutes everything in the room including things a filter cannot touch.

Gases are the clearest example. Carbon dioxide from breathing, volatile compounds from paint and cleaning products, and cooking odours all pass straight through HEPA media, and only an activated carbon layer captures part of them.

Put simply, filtration cleans the air you already have and ventilation gives you different air. Almost every disagreement about this topic comes from treating those as the same service.

Pollutant By Pollutant Which One Wins

The honest comparison is not overall but item by item. The table below covers the pollutants that actually prompt this question in a home.

What you are dealing with Open window Air purifier Better option
Frying smoke and cooking particles Clears fast if cross-ventilated Captures particles slowly Extractor fan first, then window
Cooking odours and other gases Diluted quickly Only with carbon media Window
Carbon dioxide from a full room Only real fix No meaningful effect Window
Paint, solvents, new furniture fumes Dilutes the source Carbon helps, HEPA does not Window
Pollen during allergy season Brings more in Removes it continuously Purifier, windows shut
Wildfire or bonfire smoke Makes it worse Designed for this Purifier, windows shut
Dust and pet dander Little effect Direct removal Purifier
Damp and humidity Depends on outdoor humidity No effect at all Ventilation or a dehumidifier
Traffic particles at rush hour Imports them Removes them Purifier, windows shut

Read the middle two columns before the verdict column. In several rows one option is not merely weaker but actively counterproductive, which is the part people miss.

The cooking row deserves a note because it is the most common daily case. Extraction at the source beats both alternatives, and a window helps mainly when the extractor is weak or absent.

When Opening The Window Makes Things Worse

Window Risks

Free is not the same as harmless, and outdoor air is not automatically clean air.

The EPA advises avoiding ventilation with outdoor air when outdoor pollution is high, or when it makes your home too cold, hot, or humid. That single sentence rules out a large share of the year in many places.

Smoke events are the sharpest case. During wildfire smoke the outdoor particle load can exceed indoor levels by a wide margin, and opening up undoes hours of filtration in minutes.

Pollen behaves the same way for anyone with hay fever. An open bedroom window on a high-count evening is the reason many people wake up congested and blame the bedding.

Traffic is the quiet one. A window facing a busy road at rush hour imports exactly the fine particles a purifier is there to remove.

Humidity closes the list. Opening up on a warm damp day can raise indoor moisture enough to encourage mould, which is a worse problem than the stuffiness you were trying to fix.

How To Ventilate Properly When You Do Open Up

If conditions are good, a window is genuinely powerful, and technique multiplies what it delivers.

Open more than one, on opposite sides of the home where possible, and leave internal doors open. The EPA describes this cross-ventilation as the way to increase the effect substantially.

Use the fans you already own. Bathroom and kitchen fans that exhaust outdoors remove pollutants at the source rather than spreading them through the house.

Add a box or tower fan in front of an open window when there is no breeze. Moving air deliberately is far more effective than waiting for weather to do it.

Keep the sessions short and purposeful in cold weather. Ten minutes of wide opening exchanges the air with less heat loss than an hour of a slightly cracked window.

Do not open up where it creates a safety risk, particularly with young children or anyone whose asthma is triggered by outdoor air. The free option is only free if it is safe.

What The Filtration Route Actually Costs

A purifier is the option with a bill attached, and knowing the size of it makes the comparison fair.

Electricity is the smaller half for most units, especially when run on low with auto mode enabled. Fan speed drives consumption, so a correctly sized unit costs less to run than an undersized one working flat out.

Filters are the larger half. Levoit list prices run from $22.49 for a Core Mini-P filter to $62.99 for the LV-H133 Tower as of August 2026. The popular Core 300 Series filter sits between them at $29.99, and most homes change filters more than once a year.

Sizing decides both numbers. Our guide to how much CADR your room needs explains why an undersized unit costs more in power and filters while cleaning less.

Runtime is the last lever. Our guide to how long to run an air purifier each day covers where continuous operation stops paying for itself, and our guide to replacing filters covers how to avoid buying them early.

Running Both On The Same Day

The two approaches are not rivals in practice, and most homes should use each at the times it works.

Ventilate on mild, low-pollen, low-traffic days, especially after cooking, cleaning, or anything with a smell. That is when outdoor air is an upgrade rather than an import.

Filter when the outdoor number is bad or the calendar says pollen. Windows shut, purifier on, and let the room recover.

Run both together on a good day if you like. A purifier working while a window is open is not wasted, since it catches part of what comes in, and the ventilation handles the gases it cannot.

Check an air quality index reading before deciding rather than judging by how the day looks. An index above 100 signals conditions unhealthy for sensitive groups, and above 150 unhealthy for everyone, which is a clearer instruction than a glance out of the window.

The Third Option Most Homes Skip

Framing this as a two-way choice hides the option that outperforms both, and the EPA puts it first in its own guidance.

Source control means removing or reducing whatever is producing the pollutant. It beats filtration and ventilation because nothing has to be captured or diluted afterwards.

The kitchen is where this pays fastest. Using the extractor every time you cook, and using the back burners where the hood catches more, removes particles and gases at the point they are created.

Entryways come next. A doormat and a shoes-off habit keep a surprising share of outdoor dust, pollen, and road grime from ever entering the rooms you are trying to clean.

Humidity control belongs on the same list. Keeping indoor moisture in a moderate band discourages mould and dust mites, and neither a purifier nor an open window addresses the underlying dampness.

Product choices matter more than people expect. Unscented cleaning products, fewer candles, and letting new furniture and paint off-gas in a ventilated space all reduce the load before any appliance is involved.

Vacuuming with a sealed HEPA machine finishes the set. Ordinary vacuums can re-suspend fine dust, which turns a cleaning session into a particle event that the purifier then has to undo.

None of this replaces the two options above, and that is the point. Source control lowers the baseline, ventilation handles the gases, and filtration catches what remains, which is why the homes with the best air are rarely the ones with the most expensive appliance.

Which Fits Your Air, Your Street, and Your Season

Home Verdicts

You live somewhere with mild weather and clean outdoor air: open windows daily and treat a purifier as a seasonal tool. Ventilation handles the gases and odours that dominate ordinary household air.

You live on a busy road or near industry: keep windows shut during peak hours and run a purifier continuously. Ventilate late evening or early morning when traffic drops.

You have hay fever: filter through the season with windows closed and ventilate outside peak pollen hours. Our roundup of air purifiers worth buying covers models sized for bedrooms.

You face wildfire smoke each year: the purifier is not optional and the window is not an alternative. Plan filter stock before the season, since prices and availability both move when smoke arrives.

You cook often in a small kitchen: extraction beats both. Use the hood every time, open a window to finish the job, and let the purifier handle whatever lingers.

Your home feels stuffy rather than dusty: that is carbon dioxide and humidity, so ventilate. A purifier will run all day without changing the feeling you are trying to fix.

The Practical Rule

Ask one question before choosing: is the thing bothering you a particle or a gas. Particles favour the filter, gases and stuffiness favour the window, and that split resolves most cases immediately.

Then ask whether outdoor air is currently better or worse than indoor air. On a good day the window is the more powerful tool and it costs nothing, and on a bad day it is the fastest way to make a clean room dirty.

Own both options and switch between them by conditions. The households that get this right are not the ones that spent more, but the ones that stopped treating fresh air and filtration as competing purchases.

FAQ

Is opening a window as good as running an air purifier?

It depends entirely on the pollutant. A window dilutes gases, odours, and carbon dioxide that a filter cannot capture, while a purifier removes particles without importing whatever is outside. For cooking fumes a window wins, and for pollen or smoke season the purifier wins.

When should I keep the windows shut and run the purifier instead?

Whenever outdoor air is worse than indoor air. The EPA advises avoiding ventilation with outdoor air when outdoor pollution is high, which covers wildfire smoke, high pollen counts, and busy road traffic at rush hour. Check an air quality index number before deciding.

Does an air purifier remove carbon dioxide or cooking smells?

It removes almost no carbon dioxide, and it removes odours only if it has an activated carbon layer. HEPA media captures particles, not gases. Stale, stuffy air is a ventilation problem and no amount of filtration fixes it.

Can I use a window fan and a purifier at the same time?

Yes, and on mild low-pollen days that combination is the strongest option. Use the fan to bring fresh air in or push stale air out, and let the purifier catch particles that come with it. Turn the window plan off when outdoor air degrades.

Which is cheaper over a year?

A window costs nothing to open but can cost a lot in heating and cooling. A purifier costs electricity plus filters, and Levoit replacement filters run from $22.49 to $62.99 depending on the model as of August 2026. In mild weather the window is cheaper, and in extreme weather it is not.

Sources

About the author. Jay Lim runs HomeVersus as an independent, one-person publication. Articles are researched against official documentation, pricing pages and regulators rather than hands-on lab testing. How we research · Report an error


Some links may be affiliate links. We may earn a commission at no extra cost to you.

This article was written with AI assistance. It is researched and fact-checked, not based on personal hands-on testing unless explicitly stated.

Thursday, August 20, 2026

HEPA or MERV 13: What Each Filter Actually Catches

HEPA Versus MERV 13

MERV 13 Covers the House and HEPA Covers the Room

The Short Version

Choose MERV 13 for the furnace and a HEPA unit for the room you sleep in. EPA describes MERV 13 as capturing at least 50% of particles from 0.30 to 1.0 microns and at least 90% from 3.0 to 10.0 microns. HEPA is defined at 99.97% removal at 0.3 microns, so it is far stricter at the size that matters most.

The catch is airflow. HEPA media is too dense for a typical residential duct, so it lives inside a portable unit with its own fan rather than in your filter slot.

Two Scales That Were Never Meant to Meet

MERV runs from 1 to 16 and describes a filter you slide into a system that already exists. It has to balance capture against the pressure your blower can overcome.

HEPA describes media performance under a laboratory test, with no promise about the fan pushing air through it. That is why HEPA sits above the MERV scale rather than at a point on it.

Comparing the two directly is a category error people make constantly at the hardware store. One is a system compromise and the other is a media specification.

Why 0.3 Microns Is the Hardest Size to Catch

Filters do not work like sieves, which is the detail that makes the numbers confusing. Large particles are intercepted, and very small ones move erratically enough that they collide with fibres on their own.

Between those two behaviours sits a worst case, and it lands near 0.3 microns. EPA calls this the most penetrating particle size, and notes that larger and smaller particles are trapped with even higher efficiency.

So the HEPA figure is deliberately measured at the filter weakest point. A media that removes 99.97 percent of its hardest target does better on everything either side of it.

What Each MERV Number Promises at Each Particle Size

Rating Comparison

The scale is not linear in any way that matches intuition. Jumping from MERV 8 to MERV 13 changes what the filter does to fine particles far more than the five step gap suggests.

Rating 0.30 to 1.0 microns 1.0 to 3.0 microns 3.0 to 10.0 microns Typical use
MERV 1 to 4 Not rated Not rated Under 20 percent Protects the equipment, not you
MERV 8 Not rated 20 percent or more 70 percent or more Common builder default
MERV 13 50 percent or more 85 percent or more 90 percent or more EPA recommendation for homes
MERV 16 95 percent or more 95 percent or more 95 percent or more Commercial and hospital ducts
HEPA 99.97 percent at 0.3 microns Higher than at 0.3 Higher than at 0.3 Portable units and sealed housings

Read the first column and the argument settles itself. Smoke, cooking particles, and most of what triggers allergies live in that fine band, and MERV 8 does not have a rating there at all.

Note also what MERV 16 buys you. EPA observes that increasing filter efficiency above MERV 13 produces only modest predicted decreases in indoor particle concentrations, so the last few percent rarely justifies the pressure penalty in a house.

The Filter Your Blower Can Actually Push Air Through

Every filter costs pressure, and a home system was sized for the resistance its designer assumed. Denser media raises that resistance immediately.

EPA states that most furnaces and HVAC systems can accommodate a MERV 13 filter without creating equipment problems, provided the filter is replaced frequently. That last clause carries the weight, because a loaded filter chokes airflow long before the calendar says it is due.

The failure looks like weak vents, longer run times, and in winter a furnace that trips on high limit. None of that appears on the day you install the filter, which is why the cause is so often missed.

Filter thickness helps more than most people expect. A four inch pleated cartridge at MERV 13 presents far more surface area than a one inch filter at the same rating, so it holds the same dust with less resistance and lasts longer between changes.

If your slot only takes one inch media, shorten the replacement interval rather than dropping the rating. Our guide to how often to replace an air purifier filter applies the same logic to portable units.

Where a Portable HEPA Unit Beats the Ducted Filter

A ducted filter cleans nothing while the fan is off. If your system cycles for ten minutes an hour in mild weather, that is ten minutes of filtration and fifty minutes of still air.

A portable unit runs on its own schedule in the room you occupy. That is the real reason bedroom purifiers outperform their ratings, and why the room you choose matters more than the model.

Sizing then decides everything else, and that is a CADR question rather than a HEPA question. We worked through the arithmetic in how much clean air delivery rate your room needs.

Running hours matter just as much as capacity. A smaller unit left on continuously often beats a larger one used in short bursts, as we set out in how long to run an air purifier each day.

HEPA Type and True HEPA Are Different Words

HEPA has a definition behind it. EPA cites the Department of Energy standard of at least 99.97 percent removal of particles at 0.3 microns, and a product either meets that or does not.

HEPA-type, HEPA-like, and 99 percent HEPA style claims carry no equivalent standard. They describe media that resembles HEPA construction without committing to the number that defines it.

The tell is simple. A page that avoids stating 99.97 percent at 0.3 microns is usually avoiding it for a reason, so treat the media as unrated and shop on measured clean air delivery instead.

What Neither Rating Covers

Both scales measure particles. Gases, odours, and volatile organic compounds pass through a pleated filter and a HEPA cartridge alike.

That is why serious units add activated carbon as a separate stage. Carbon adsorbs gas molecules and saturates over time, so it has its own replacement schedule that has nothing to do with visible dust.

Humidity is a third thing again. A filter of any rating does nothing about damp air, and mould control belongs to ventilation and moisture management rather than filtration.

Bypass is the quiet one. Air takes the easiest route, so a filter sitting loose in an oversized slot lets a share of the flow slip around the media untouched.

That leak scales with rating. The denser the filter, the more attractive the gap beside it becomes, which is how a MERV 13 upgrade sometimes changes nothing measurable. Seal the frame edges before you blame the filter.

Which Filter Fits Your Home

Verdicts By Household

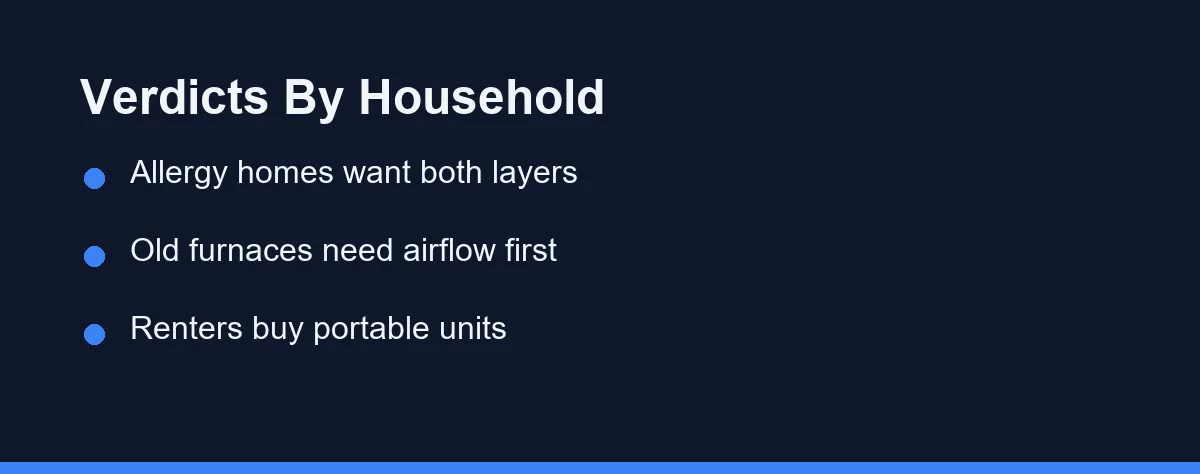
Allergy household with a ducted system: run MERV 13 in the furnace and add a HEPA unit in the bedroom. The ducted filter handles the whole house baseline while the portable one covers the eight hours you spend breathing in one room.

Older furnace with a one inch slot: raise the rating carefully and watch airflow. MERV 13 in a thin filter loads fast, so pair it with a shorter replacement interval or step down to MERV 11 rather than starving the blower.

Renter with no access to the system: skip the MERV question entirely and buy on clean air delivery rate, using our roundup of air purifiers worth the money as a starting point. Nothing you install in a rented duct comes with you when you move.

Wildfire smoke region: you need the fine particle column, so MERV 13 is the floor rather than the goal. Add a HEPA unit sized above the room and expect filters to load in weeks rather than months during a smoke event.

Household chasing odours rather than dust: filtration alone will disappoint you. Look for activated carbon by weight, because a token carbon sheet in a HEPA unit saturates in a season and then does nothing.

Before You Buy the Highest Number on the Shelf

Check the slot depth, then the rating, then the replacement habit. A four inch MERV 13 changed on schedule beats a MERV 16 that nobody remembers to replace.

For the room where you sleep, buy clean air delivery rate rather than a badge. The full EPA guidance on filters and air cleaners is worth reading once at epa.gov before you spend anything.

Filters only clean the air that reaches them. Everything else is a fan problem.

FAQ

Is a MERV 13 filter the same as HEPA?

No, and the gap is wider than the labels suggest. EPA describes MERV 13 as capturing at least 50 percent of particles between 0.30 and 1.0 microns, while a HEPA filter is defined as removing at least 99.97 percent of particles at 0.3 microns. MERV 13 is the practical ceiling for most ducted systems, and HEPA sits outside the MERV scale entirely.

Will a MERV 13 filter damage my furnace?

Usually not. EPA states that most furnaces and HVAC systems can accommodate a MERV 13 filter without equipment problems, provided the filter is replaced frequently. The risk is a clogged filter starving airflow rather than the rating itself, which is why a neglected MERV 13 is worse than a maintained MERV 8.

Does a HEPA purifier remove cooking smells and smoke odour?

It removes the particles and leaves much of the smell. HEPA media traps solid and liquid particles, while odours are gases that pass straight through unless the unit also carries activated carbon. Smoke is both, so a purifier can clear the haze in a room and still leave the kitchen smelling like last night.

Is a HEPA-type filter as good as true HEPA?

The two phrases are not interchangeable. HEPA is defined by the Department of Energy at 99.97 percent removal at 0.3 microns, while HEPA-type and HEPA-like are marketing descriptions with no equivalent guarantee. If a product page avoids the 99.97 percent figure, treat the media as unrated.

Do I still need a portable purifier if my furnace runs MERV 13?

It depends on how many hours the fan actually runs. A ducted filter only cleans while air is moving, so a system that cycles for a few minutes each hour filters far less than the rating implies. A portable HEPA unit in the room you occupy runs on its own schedule, which is often the deciding difference.

Sources

About the author. Jay Lim runs HomeVersus as an independent, one-person publication. Articles are researched against official documentation, pricing pages and regulators rather than hands-on lab testing. How we research · Report an error


Some links may be affiliate links. We may earn a commission at no extra cost to you.

This article was written with AI assistance. It is researched and fact-checked, not based on personal hands-on testing unless explicitly stated.